Showing posts with label Candle Making. Show all posts

Sunday, July 5, 2020

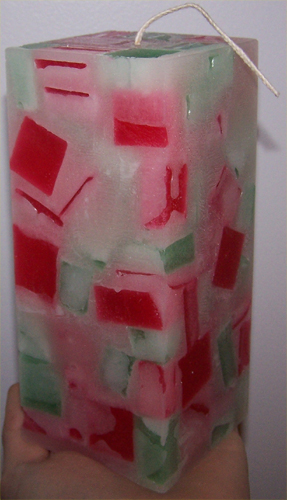
Making CHUNK CANDLES

Christmas Chunk Candle
Photo Flickr - Liz
Chunk candles add a great alternative to the standard pillar candle of yesterday. These colorful candles add a vibrancy and life to them. Looking at chunk candles, they appear to be very difficult to make. However, just the opposite is true. In fact, many candle makers claim they are easier to make than basic pillar candles. This is because pillar candles have to be perfectly smooth. If they aren’t, it is easy to see the visual defect. Such blemishes aren’t visible in chunk candles. While chunk candles aren’t recommended as a beginner project, they can be made once you know the basics of the candle making process.


There are two phases to making chunk candles. To make the process easier, it is recommended that you keep the two separate. Attempts to cut corners often result in chunk candles that are of poor quality and don’t burn well. The first phase of the project is making the chunks. The second is the process of turning those chunks into gorgeous candles. Some individuals choose to purchase pre-cut chunks at craft stores or online.

To make your candles their prettiest, select colors that compliment each other. To start making the color chunks, spray a cookie sheet with a non-stick cooking spray. You only want a thin film on the cooking sheet. After the wax you are using has completely melted, add color to it as well as any fragrance you want. Pour the mix onto the cookies sheet. Fill the sheet to the level you want the depth of your candle chunks to be.

Keep an eye on the cooling color chunks. Once it is the consistency of cookie dough you will want to use a sharp utility knife to cut it into chunks. Allow the chunks to continue cooling. If you are making several colors of chunks you can mix them together or leave them separate. Some people choose to let the colors mix together on their own while others like to create a design by adding the amount of each color they want.

Using the same molds that are used for pillar candles, insert your candle wick through the bottom of the candle mold. Fill the mold loosely with color chunks. You can put one color on the bottom with another color on top or even layers of three colors. You can also use only one color. The choice is all yours. Do not stack as many chunks as you can in the mold or the candle won’t form properly. Just toss them in and let them lay where they end up.

You are now ready to pour the melted wax over the color chunks. It is recommended that you do leave the melted wax colorless, but some people choose to add a light color to tint it and add a uniqueness to their chunk candles. As the candle cools, the chunks will adhere to together with the hot wax. Once the molds cool the chunk candles should slide out with ease.

Making chunk candles is really quite simple if you have the basic candle making concepts under your belt. These candles add flair to any décor as well as make great gifts. They are a bit more time consuming to make since you will be making your color chunks, but well worth the results. Remember that you can purchase color chunks to save you time. That is a great option for someone who plans to make large quantities of chunk candles.


For those who want to get even more creative, consider using embeds on the sides. You can place them in the candle molds first. They will stay in place once you put the chunks in the mold. You can adjust the embeds as needed prior to adding the hot wax to the mold. There are excellent books available on the various patterns and embeds you can add to make specific chunk candles. There are also great pictures and step by step instructions available on the internet.

Monday, November 12, 2018

Problems and Solutions for CANDLE MAKING

English: Candle factory and shop, Denmark
English: Candle factory and shop, Denmark (Photo credit: Wikipedia)
Making candles can be great fun. It is very exciting to decide what type of candle to make and get your supplies. However, some individuals quickly become disappointed and frustrated with the process and give up. There are some common problems that beginners experience with candle making. Most of them have quick and easy solutions. It is recommended that all beginners start with the basic candle making process. This gives you the opportunity to learn the basics, then you can move on to making the types of candles you really want to.

One secret to making great candles is to use quality products. In general, candle making supplies are inexpensive. If the wax you purchase is of poor quality, then it is never going to make quality candles. Heating the wax to the proper temperature is very important. The temperature will change depending on the type of candle you are making with it. If the wax isn’t hot enough it won’t form correctly. Likewise, wax that is too hot will lose luster and won’t be as sturdy once it cools. 

Have you ever made a beautiful candle, but when you lit it the room filled with smoke rather than the fragrance of the candle? This problem has to do with your wick, it is too long. Simply cut them shorter for future candles. You can snip the tips of the candles you have already created and this should remedy the situation.

Some candles burn and smell great, but they look ugly after a few uses with a crater in the middle of the candle while the edges of the candle jar haven’t even been touched. This is the result of a wick that isn’t wide enough. It isn’t much you can do for candles you have already made except melt the wax in them and start over. You can purchase a wider wick or braid three together to get a good thickness. The wider the candle jar, the wider you need your wick to be for the candle to burn evenly.

Cooling candles is an area of trouble for many beginners. Don’t rush the cooling process or you will damage the hardness of the candle. Forcing the candle to cool will also result in bubbles forming in the top and middle of the candle. While it won’t be a physical defect, the melting wax will go into these bubbles when you have the candle lit resulting in the wick going out. Candles should be allowed to cool in an area where they won’t be moved until completely cool. The area needs to be flat and out of direct sunlight. You will also want to make sure there aren’t any heating or cooling vents in the cooling area. 

If you notice that your cooled candle isn’t as appealing as you’d like because the wax pulled away from the glass jar in some areas, try heating your jars in the microwave for a minute or two right before you fill them. This will help the wax adhere to it correctly with a very smooth look all the way around the jar.


It is important to remember that candle making involves some basic concepts. It will take a few tries to complete the steps properly, but give it some time. You will have to experiment to find the methods that work best in your work environment to make the candles you want. It is suggested that you only make a few candles at a time to keep from wasting money on supplies while you are learning. Make sure the finished product doesn’t have any burning issues with the wick or bubbles. If it does, simply melt the wax again and try it once more. Once you have mastered the basics of candle making, you can experiment with different types of candles. The internet is a great place to find candle making tips as well as troubleshooting for your candle making problems. 


Thursday, October 11, 2018

Making Votive CANDLES

Votive candles at a homemade altar.
Votive candles at a homemade altar. (Photo credit: Wikipedia)

Votive candles are simple, yet beautiful. These candles are often used to accent a centerpiece or design. Often it entails more than one votive candle, but not always. Votives are very cost effective because they burn for about fifteen hours. Votives must have a holder as they are not safe to use as a free standing candle. 

Many individuals choose to use votive candles in their jack-o-lanterns at Halloween because they burn for a long time and illuminate the entire face of the jack-o-lantern. They are also one of the easiest types of candles to make. For beginners in the area of candle making votives provide a great learning experience to learn the basics of the candle making process.

To get started, you will need to gather your votive candle items. This includes wax, molds, a double boiler, and a thermometer. You will need to have wick and wick tabs for votive candles. The wick tabs serve as a base for the candle. You can choose to purchase dye and fragrance if you wish for your votive candles. To ensure your candles will form properly in the molds, consider investing in mold spray to keep them clean and lubricated.

Once the wax has melted, add in any colors and fragrances. Immediately pour the melted wax into the molds, filling them to the lip of the mold. For easy cleanup, place old newspaper under the wax molds before you pour the wax into them. You will need to save about 20% of the melted wax for the next pouring process.

While the wax is cooling in the molds, prepare your wicks. Attack a wick several inches longer than the mold to a wick tab. Dip the wicks into the hot wax. Keep an eye on the votive molds as they won’t take as long to cool as other types of candles. Once you can tell the wax is starting to harden, insert a wick with the tab into each mold through the bottom. As the wax continues to cool, it will meld to the metal tab, ensuring it stays in place at the base of the candle. As the candles cool, make sure your wick is staying in the center of the votive. 

Once the wax has completely cooled, you will notice a sinkhole in it due to shrinkage. You will want to pour melted wax into the molds again to remedy this. Make the wax about fifteen degrees hotter than the original wax you used to fill the votives. After the candles have completely cooled again, they will slide out of the molds easily. Trim the wick to about ½ an inch from the top of the candle. For safety, you will want to use a votive holder that is an inch or two taller than the candle itself. 

Votive candles add class and charm to any home or special occasion. They are fun and simple to make. You can add any color or scent to your votive candles to add a personal touch to them. Votive candles burn for a long time, making them a worthwhile candle to use. They also make excellent gifts. To make the process even less expensive, look for votive candle holders at thrift shops and yard sales. You can further personalize your votive candles by applying pretty ribbon with a hot glue gun around the rim of the votive candle holder. 


Wednesday, September 12, 2018

The History of CANDLE MAKING

Candle Making - Photo: Flickr
The art of making candles has been around since primitive times. Of course, as time went by they become much different in design than what they were back then. In the early days, candles were a necessity for heat and light. Today they serve as decorations, wonderfully smelling mechanisms in our homes, and offer light for romantic dinners and baths.

The first known use of candles is not completely known. The remains of clay candle holders that date back to 4 BC have given us the knowledge that they have been in use for a very long time. Those clay candle holders were found in Egypt.

Candles were also used in ancient times in both China and Japan. These candles were made of wax extracted from insects and seeds. The taper candles of India were made from the wax extracted from boiled cinnamon. Candles are not known to exist in American until 1 AD. It is believed Native American’s burned oily fish and the back of the Cerio tree. When settlers came to New England, they used similar techniques to extract wax from bayberries. Many modern candle makers still use that process to make bayberry candles. However, it is quite expensive to do so.

Tallow was the product used to make candles in the 1600’s and 1700’s. This is a byproduct from animal fat. The product worked well but had a foul odor, especially when it was burning. Beeswax and paraffin wax both were introduced in the early 1800’s, and tallow stopped being used.

The dipping process for taper candles as we know it today began in 13 AD. Traveler merchants went door to door from town to town. While there, they made taper candles for individuals in their homes. Around 15 AD the idea to use molds for various types of candles was introduced in Paris. While this greatly improved the candle making process, there were still issues with getting the candles to burn properly.

In the 1800’s, candle makers felt the wick was the weakest area of the candle as well as the cause for defective burning patterns. A braided wick was developed in 1825 that seemed to greatly improve the burning of several types of candles. By 1830, a process was in place to make candles using paraffin wax and molds. These candles were of good quality and burned well.

As gas and electricity were introduced, the candle making process continued to evolve. It became much easier and faster to melt the paraffin wax. It is believed that the reason so many of the elements of candle making stayed the same, including the hand dipping process is that the popularity of candles diminished with the introduction of electricity.

Today, candle making is a well-known art form. There are many companies who manufacture wonderful candles with some very unique fragrances. There are also small businesses that still make their candles by the home in their kitchen. Candle making is a great hobby and fun activity for the whole family to be involved in.

Candles are now used more for luxury and pleasure than for light or heat. The candle industry continues to grow with new types of candles being introduced all the time. The amount of colors, fragrances, and types of candles to choose from in the marketplace is absolutely amazing.


Candles are a very common home decorating item. They are used to accent any room in your house. They are a common centerpiece for dinner parties and formal occasions. The unity candles that are presided over at many weddings hold a deep sense of tradition in the American culture.

The art of making candles has definitely changed over time. If you are interested in trying your hand at it, choose a candle that is fairly easy to make such as the container candle or the votive. This will allow you the chance to get used to the process. There are several good candle making kits available for a low price as well as books to give you tips and assistance along the way.


Wednesday, February 28, 2018

CANDLE MAKING Basis

wick of a candle Ελληνικά: φιτίλι κεριού
Wick of a candle (Photo credit: Wikipedia)
The use of candles for light and heat is known to have existed in ancient times. The remains of candles have been found in the caves of France. It is believed that cavemen used them while painting and etching on the walls. It is believed those candles were made out of animal fat. The Egyptians used candles as well by dripping beeswax onto leave stems. The burning process of a candle involves the four basic elements of matter which are solids, liquids, gas, and plasma.

Today candle making is a fun hobby or craft. For some, it is a very profitable business venture. Candle making provides you with the ability to create wonderful designs and crafts out of your candles. There is no limit to the shapes, sizes, and colors you can make your candles in. A candle is a device to provide light or fragrance. Candles have become very popular for the wonderful aromas more than for their ability to produce light. Some candles give off a popular smell such as vanilla or jasmine. Others smell like a chocolate cake or cinnamon rolls.

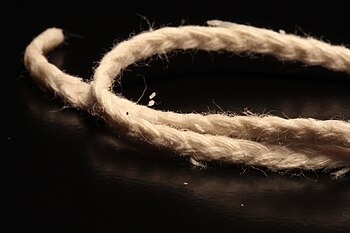
The body of a candle is generally made of paraffin wax. It can also be made out of beeswax. Paraffin wax is a natural wax that comes from plants. This wax can be purchased from Petroleum Refinery or the Specialty Wax Processor. Beeswax is also considered a natural wax and is taken from honeybees. This is the substance the bees use to construct their honeycombs. A wick is placed in the center of the wax before it dries. The wick is made of cotton fibers that have been braided together. The wick is very thin, but also very powerful. Sometimes candle makers will use a wick that is wider than normal to increase the size of the flame.

Safety is a very important part of candle making. The temperature of the hot wax can result in severe burns. There is also the risk of fire. Make sure your candle making area is set up properly and that you have a fire extinguisher in the area. Clean up spills quickly as they will become very slick, leading to falls if you walk across them.

To make candle making fun instead of frustrating, a start will making simple candles. This is a great opportunity for you to discover what works well with your set up and gives you the chance to make necessary changes. Initially, work at implementing good safety habits and melting your wax at the proper temperatures. You will also want to experiment with your cooling process. Once you have these areas down, you will start to relax and the process will become more natural to you. This is the right time to start experimenting with dyes, scents, and shapes for your candles. 


The candle making process is easy to follow if you take your time and learn from your mistakes. Those who are impatient and take multitasking to an extreme will most likely not enjoy the art of candle making. However, it is very enjoyable by those who have plenty of time to take with the process and who enjoy creating things. Candle making supplies aren’t expensive so use the best you can. This will also help ensure your candles form well and burn properly.


Thursday, November 30, 2017

CANDLE MAKING - Additives

English: Burning Red Candle Deutsch: Brennende...
Burning Red Candle Deutsch: Brennende rote Kerze
(Photo credit: 
Wikipedia)
There are eight distinct candle making additives used in the candle making process. Some makers choose not to use them at all while others take advantage of what each type of additive has to offer to their candle making process. Candle wax additives are inexpensive and work well if you are educated in how to use them and why to use each kind. 

Kemamide is a fine powder. It has a hint of ivory in the color, but it is close to being transparent. This type of additive becomes clumped if it is exposed to humidity so keep it in a closed, dry environment. Use this type of additive as a release agent. Add one teaspoon for each pound of wax.

Poly-AC is a fine powder, white in color. It has a dry texture and should also be stored in a dry environment to prevent clumping. This additive is a hardener. To be effective, add one teaspoon for each pound of wax. 

Chimasorb 81 is a powder with a yellowish tint. Of all the additives, this one is the most likely to clump, even in areas of low humidity. Chimasorb 81 is used to enhance color. You do not need much of it, 1/10 of a percent for each pound of wax. 

Stearic Powder is flaky. The color is white. This additive doesn’t react to humidity at all so it is an agreeable product to use for hardening. They amount you will use depends on the type of candles you are making. This additive helps reduce the temperature needed to melt the wax. Add about three teaspoons for each pound of wax. Be careful not to over use Stearic Powder as doing so will cause damage to the wax. 

103 Vybar generally is sold in the form of very small beads. The beads flow loosely and do not stick or clump together, even in areas of high humidity. 103 Vybar is a hardener as well. It will add a very creamy texture to your candle wax. This is a perfect hardener to use for scented candles. Add one teaspoon to for every pound of wax. 

Paraflint is another hardener. It comes in beaded form similar to the 103 Vybar. However, the beads are much larger. You will want to use one teaspoon for every pound of wax. 

Poly 400 comes in the form of beads that vary is size and shape. This is a UV inhibitor, which will keep your candles from fading in the sunlight. This additive is also to be used at the rate of one teaspoon for every pound of wax. 

BHT Crystal is a yellowish powder. This is an antioxidant for wax that has been stored in liquid form for a length of time. Using this crystal will also add a very pretty luster to your wax. 


Candle making additives can add a variety of features to your wax. The type of additives you choose to use will depend on the types of candles you are going to make as well as the climate in your region. Be careful to use candle making additives in the right amounts or you will cause damage to the wax, resulting in ill effects in the visual aspects of the candles as well as their ability to burn properly. There are many great candle making books out there to help you figure out which types of additives to use for the various types of candles you can make. 


Saturday, September 30, 2017

Problems and Solutions for CANDLE MAKING

wick of a candle Ελληνικά: φιτίλι κεριού
Wick of a candle  Photo credit: Wikipedia)
Making candles can be great fun. It is very exciting to decide what type of candle to make and get your supplies. However, some individuals quickly become disappointed and frustrated with the process and give up. There are some common problems that beginners experience with candle making. Most of them have quick and easy solutions. It is recommended that all beginners start with the basic candle making process. This gives you the opportunity to learn the basics, then you can move on to making the types of candles you really want to.

One secret to making great candles is to use quality products. In general, candle making supplies are inexpensive. If the wax you purchase is of poor quality, then it is never going to make quality candles. Heating the wax to the proper temperature is very important. The temperature will change depending on the type of candle you are making with it. If the wax isn’t hot enough it won’t form correctly. Likewise, wax that is too hot will lose luster and won’t be as sturdy once it cools.

Have you ever made a beautiful candle, but when you lit it the room filled with smoke rather than the fragrance of the candle? This problem has to do with your wick, it is too long. Simply cut them shorter for future candles. You can snip the tips of the candles you have already created and this should remedy the situation.

Some candles burn and smell great, but they look ugly after a few uses with a crater in the middle of the candle while the edges of the candle jar haven’t even been touched. This is the result of a wick that isn’t wide enough. It isn’t much you can do for candles you have already made except melt the wax in them and start over. You can purchase a wider wick or braid three together to get a good thickness. The wider the candle jar, the wider you need your wick to be for the candle to burn evenly.

Cooling candles is an area of trouble for many beginners. Don’t rush the cooling process or you will damage the hardness of the candle. Forcing the candle to cool will also result in bubbles forming in the top and middle of the candle. While it won’t be a physical defect, the melting wax will go into these bubbles when you have the candle lit resulting in the wick going out. Candles should be allowed to cool in an area where they won’t be moved until completely cool. The area needs to be flat and out of direct sunlight. You will also want to make sure there aren’t any heating or cooling vents in the cooling area.


If you notice that your cooled candle isn’t as appealing as you’d like because the wax pulled away from the glass jar in some areas, try heating your jars in the microwave for a minute or two right before you fill them. This will help the wax adhere to it correctly with a very smooth look all the way around the jar.

It is important to remember that candle making involves some basic concepts. It will take a few tries to complete the steps properly, but give it some time. You will have to experiment to find the methods that work best in your work environment to make the candles you want.


Tuesday, August 22, 2017

Ajello CANDLES

The motto of the Ajello Candle Company is “It’s better to light a candle than to curse the darkness”. This candle making company has been in business since 1775. The business has been family owned for seven generations. The candles from Ajello’s are well known for their beauty and quality. While they make more candles now than in 1775, their dedication to quality and to customers has never changed. 

Candle - Photo: Wikimedia


The Ajello Candle Company was founded by Rafael Ajello, an Italian painter. He was also a beekeeper, so he tried his hand at using bees wax to create candles. He worked hard to create a formula that worked well. The formula, combined with his outstanding artistic ability, lead to the birth of the Ajello Candle Company. In 1785, the company earned the honor of creating all the candles for the Vatican. He and his wife ran the business, keeping their children involved in the processes from an early age. As time went on, their children and grandchildren kept the business running as well as passed the family business on to their children. 

By 1862, the company had established itself as a leader in the candle making industry. They had also added perfumes and many colors to their line of outstanding candles. They decided to extend the business to Manhattan, New York. In both places, the business prospered. Kings and aristocrats in Italy wanted the services of the Ajello Candle Company. They designed candles for weddings, funerals, and ceremonies. They made the candles for the inauguration of the King of Spain in 1876, Pope Pius IX in 1878, and Pope Leo in 1902. Hollywood stars and rich people in Beverly Hills California wanted the candles from the Ajello Candle Company as well. Candles were also ordered by President Roosevelt, Charles Lindbergh, and Rudolph Valentino.

In 1922, the Ajello Candle Company made a memorial candle for their deceased friend Enrico Caruso. This candle was 18 feet tall and weighed more than a ton. It is estimated this candle could burn 24 hours a day for 1,800 years before running out of wax. This enormous memorial candle remains the largest one ever made in the world. Each year it is lit twice to honor the day Enrico Caruso was born and the day he died. 

The Ajello Candle Company continued to grow and sells were well beyond anticipated both in Italy and the United States. In 1953 the company was asked to create 2,200 candles for the coronation of Queen Elizabeth. The company was honored to meet the request and had all the candles ready in six months. The Ajello Candle Company was approached to be bought out but refused. The family wanted their candle business to remain just that, not a major corporation. 

Despite the creative efforts of the Ajello Candle Company, they were not able to meet the demand for their candles in 1965 during the blackout in New York City. The age of computers has found the Ajello Candle Company offering candles via the internet. Ironically, as Rafael Ajello worked around the clock to make candles for this need, his wife was giving birth to their child at a hospital scrambling to find candles for her room. 

The Ajello Candle Company is still going strong today, offering quality candles that are beautiful as well as made of the best quality products. These candles can be purchased in many specialty stores throughout the world as well as on the internet in the comfort of our homes. This candle making business has spanned many generations, yet continues to hold the traditions and values of Rafael Ajello who started this business more than two centuries ago. 

Anyone who has access to the internet should take a look at www.ajellocandles.com. Your breath will be taken away at the gorgeous candles there. I have never seen such beautiful wedding candles or unique decorating candles. I have seen a lot of candles, and I was very impressed. While Ajello Candle Company has made many custom candles for celebrities and royalty, they are very willing to do it for you as well. Simply select what you want and they will provide you with the best quality candles ever made. 


Friday, July 28, 2017

Use Old Crayons to MAKE CANDLES

If you have children in your home, chances are you have an abundance of worn down crayons that don’t get used much anymore. Before throwing them out and buying new ones, consider using them to make candles. This can be a great way to turn them into something new and bright again. Most children will love the idea of creating candles with you and enjoy knowing their old crayons helped create them. Making candles out of crayons can also be a great gift giving idea. 

English: Wax crayons. Español: Lápices de cera...
Wax crayons
(Photo credit: 
Wikipedia)

Before you get started, discuss safety with your children. Since the crayons will have to be melted at a very high heat, they will not be able to participate in that portion of the candle making process. Assure them that there are many other aspects of the candle making that they can be a part of. To start, gather your supplies. In addition to the crayons, you will need a wax cartoon. This can be from milk, fabric softener, or orange juice. You will also need paraffin wax, two full ice cube trays, a double boiler, and white packing string. If you don’t want to use your double boiler an old coffee can and a saucepan will work just as well.

Trim the top off of the wax carton, leaving it approximately six inches high. You will want to cut the string at least 8 inches long. You will later cut the wick to fit the holder. To ensure a wick that burns easier take three pieces and bread them together. Use smaller pieces of string to tie the ends together. The holders for your candles can be anything you desire as long as they are non-flammable. Pretty vases, glasses, and jars work nicely.

Melt about three pounds of paraffin wax in the double boiler or coffee can. To help it melt faster, cut it into small chunks. The melting process with take about fifteen to twenty minutes. While the wax is melting, peel the papers off of the old crayons. You and your children can choose to separate the colors by lights and darks to have a mix that melds well or you can mix it all together and see what the color ends up being.

For best results, only add the crayons to the wax after it has completely melted. After the crayons and wax have both melted together, immediately remove the mixture from the stove and pour into your candle holders. If you would like to make scented candles try adding a splash of cinnamon or vanilla to your hot wax mixture.


It is important that the candles by left alone to completely harden. Make sure you have an area this can be done without disruption. It is also important to make sure small children can’t reach them, as out of curiosity they may want to check on their candles. The wax will stay hot for several hours and can scold the skin.

Making candles out of old crayons is a great way to spend the afternoon creating a neat project with your children. This process can also be done at schools and childcare centers with old crayons as presents for parents. Simply allow each child to decorate the outside of their candle holder while adults complete the rest of the process.


Monday, July 17, 2017

Unique CANDLE Gift

Are you short of ideas in deciding a gift for your friend or relatives? Selecting a gift can be a very boring process especially when you do not find a gift as per your choice. If you intend gifting your friend with a unique gift then why not try unique candle gift. 

3 candles
3 candles (Photo credit: Wikipedia)

Unique Candle Gift can be one of the best gifts that you can present to your friends on any special occasion. Giving and getting candle gift is a wonderful gift and experience that one can have. Unique candle gift offers you many categories in candles which makes your gift a unique one. Some of the categories of candles you can choose from are

• Angel Candles
• Animal Candles
• Christmas Candles
• Fish Candles
• Wedding Candles
• Sports Candles
• Holiday Candles
• Valentine Candles
• Flower Candles
• Fantasy Candles and many more

Candles are the sign of love, faith and peace. Even though candle gifts are uniquely designed and have attractive quality it is available at a very reasonable price. Today most web sites offer candles you can buy at any store.

Unique candles gifts are available in scented as well as unscented forms. Thus a unique candle gift basket is a perfect gift not just to spread light but also spread out charming and delicate fragrance.

Candle gift can be a unique gift for moth for mother's day, father's day, wedding, anniversary or Valentines Day. Candle gifts are available for different occasions like Wedding candle gift, Christmas candle gift, Valentine candle gift and so on. These candles are not only useful to gift someone but can also make a beautiful decorative item for your home or office. Candles that are offered are eco-friendly and made up of pure wax and contain no harmful chemicals.

Unique Candle Gifts are popular because its candles last for 14-15 hours and also available in various scented fragrance. The candles that are prepared are not shaped in an ordinary mold but is shaped in excellent and sophisticatedly designed molds that further adds to its beauty.

With the help of Unique Candle Gift you can enjoy the wonderful atmosphere and lightning in your surrounding. So it is the best time to present a warm gift to someone special.


Monday, June 5, 2017

Scented CANDLES And Their Soothing Power

Are you sick and tired of thinking of the perfect gift to give to your friends on their birthdays? Maybe you want to give something a lot more personalized aside from your homey but boring batches of chocolate chip cookies. You hate the thought of giving out generic gifts because you also very much abhor receiving run-of-the-mill gifts that go straight in your basement. It's high time you learn some do-it-yourself potential gift items that truly make the recipients feel honored to have you as a friend.

A Prayer
Photo by stonethestone

One time, while I was out shopping, I came across this quaint specialty shop downtown which sells exquisite how-to book on scented candles. The hard-bound book, which include materials for trial, is fairly cheap so I immediately purchased it and went home delighted. The first batch of candles I made wasn't exactly perfect but was good enough to display at my room.

If you're the kind of person who likes romantic candlelight dinner dates or whose idea of relaxation involves quiet reading time by the nook, then the scented ones are for you. These candles come in variety of shapes, sizes and yes, scents that can surely fascinate anyone. Not only are these scented accessories a beauty to behold, they also have the ability to soothe you after a tiring day at work. One has the option to perfume these wax-made products using either synthetic fragrance or essential oils.

 Get This E-Book
Get the E-Book
Both smell terrific but the latter produce more aromatic scents that can generally ease stress. Essential oils, originating from barks and stems of certain plants and flowers like jasmine, lavender, cedar wood, calendula, and lemon grass, lend unique vibrancy and authentic sensuality to a candle. Fragrance oils, on the other hand, are less expensive but also very appealing.

Do scented candles really have certain health benefits or do they also have negative effects on your body? Actually, there are particular kinds or methods of producing candles which are thought of as harmful. Candle experts agree that wicks that are made from metal are dangerous because they often cause lead poisoning and air pollution. Always make sure you purchase a candle made from paper, hemp, or cotton wicks as they are more health and nature-friendly.

Beeswax and soy varieties are also safer to use instead of paraffin. When buying questionable products, meticulously ask the vendor about the candle's method of preparation or the ingredients used. Make sure the ones you buy don't have chemical additives. Better yet, do your own ration of the candle. Through personally sourcing the materials and preparing them yourself, you can be assured you're using and giving your loved ones only the best.


Thursday, April 27, 2017

Canning Jar CANDLES

We have all seen those beautiful canning jar candles with the pretty ribbon and potpourri. It is very easy to make your own canning jar candles with just a few inexpensive items that you can get from your local craft store or online. You will need wide mouth canning jars, ribbon, potpourri, votive candles with holders, and a hot glue gun. Make your own canning jar candles to add charm to the dinner table as a center piece or gift them to family and friends for gifts.

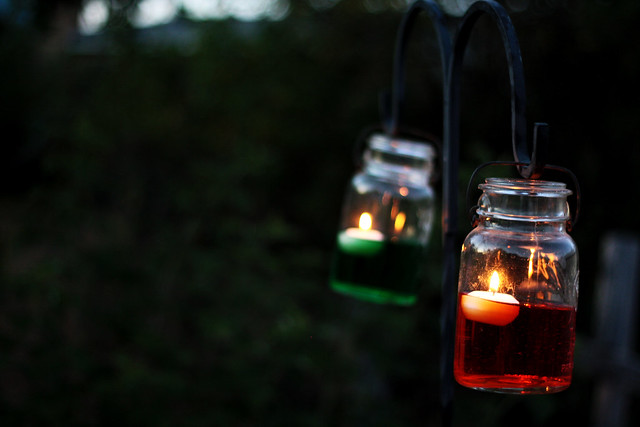
Floating Candle Jars
Flickr - TinyTall 

To start, fill the jar with potpourri. If you desire, add some extras such as dried apples or cinnamon sticks. Fill the jar full enough that when you set the candle holder on top it is even with the top of the jar. Place the candle in the holder once you have got the fit right. Next, glue the ribbon around the top mouth area of the canning jar. You can further personalize your canning jar candles by gluing on decorations. Canning jar candles are a great idea for Mother’s Day or crafts for young children to take home.

Canning jar candles are great for all Holidays as well. Add pumpkin cut outs for Halloween, little bunnies for Easter, and Christmas trees or small ornaments for Christmas. Canning candle jars make excellent fundraisers or items to sell at the next craft show. The internet offers many great canning jar candle décor ideas, especially for the holidays. Your local craft stores and the internet are great places to get canning jar candle ideas. Those of you who are more creative will have no trouble designing your own.

McCall’s canning jar candles are already made. They come with wonderful labels that are very rustic looking. This candle collection comes in many wonderful fragrances with a zinc wick. These canning jar candles come in two sizes, the 5 ounce that burns for about 30-35 hours and the 16 ounce burns for 110-115 hours. The small candles retail for $13.63 and the larger ones are $24.63. While these are great candles as well, you will miss out on the experience of candle making if you choose to purchase them. You will also be able to make several of your own for the cost of one McCall’s canning jar candle.


To save even more money when making canning jar candles, consider making your own votives. You can do this easily in you home. You will need paraffin wax, wick, and candle holders. You can choose to use dye for colored votives or scents to add a wonderful smell to the candles. It is very easy to melt the wax and add in whatever you want to make the color and smell you desire. Then simply pour the hot wax into the candle holders. To save even more, shop at thrift stores and yard sales for canning jars and votive holders at a very low price.

Canning jar candles are very easy to make and they are very beautiful. You can make them in very little time and young children will be able to do this with ease as long as you help them with the glue gun. Make canning jar candles for you own personal use or as gifts. These cute candles are very inexpensive to make and they last a very long time, giving a delicious aroma.


Friday, March 24, 2017

The Basics Requirement Of CANDLE MAKING

Before electricity was discovered and before light bulbs were invented, candles were the main source of illumination inside a building.  This makes candle making a very necessary art.  But even though electric light bulbs are now the main source of light everywhere, candles remain popular because they add to indoor surroundings a touch of coziness and romance in the atmosphere.

Learning candle making as a hobby has its own appeal and popularity primarily because there is nothing more satisfactory than being able to create something useful with one's own hands.  Candle making can also be a good source of secondary income if one becomes a master of it.

a candle (eine Kerze)
(Photo credit: Wikipedia)
There are many types of candles that you can learn to make with candle making.  The most popular type of candles are called tapers or dinner candles, the long and slender candles that are supposed to be held in place by candlesticks.

The pillar candle is a candle that can stand on its own, with a base that measures three inches or so in diameter.  Pillar candles are also called column candles and they come in various shapes.

A jar candle is another popular candle that is made when the wax is poured into a glass container that is designed to resist the heat of the candle it contains as it burns.  Jar candles are also referred to as filled candles.

If you are interested in candle making, what materials should you invest in?  Contrary to what you may think, the art of candle making does not require a lot of investment.  Most of the time, the necessary materials such as the boilers and the molds can be easily substituted for materials readily available in your own kitchen or garage.


For candle making, you would need the following materials:

• The paraffin wax, which is the basic ingredient for candle making, as well as the wick.  If you want to experiment with colors and scents, you can also get dyes and fragrance oils or essential oils.

• A double boiler for heating your wax.  A double boiler is a pan inside a pan.  The outer pan is for heating water while the inner pan serves to hold the wax being melted.  Also, a stove for heating your wax.

• A thermometer for gauging the temperature of your wax.  You would need to use a thermometer that is specially designed for candle making because the ordinary household thermometers do not have as high a range.

• A scale, a ladle and a measuring cup.  A scale will help you measure the amount of wax you would need to heat for your candles while the ladle is for getting the wax out of its boiler.  The measuring cup is for pouring wax into molds – it is safer and easier to do than simply pouring the contents of the boiler into the mold.

• Candle molds and mold seal.  The candle molds are for shaping your candles and they come in different shapes, sizes and materials.  The cheapest candle molds are made of plastic, but they are not that durable and they cannot withstand too much heat.  The best candle molds are those made of metal.  The mold seal, on the other hand, prevents the wax from pouring out of the mold.

• A blow torch or heat gun is for melting away imperfections on the surface of your finished candles.

Always remember that safety is paramount in candle making.  Be cautious about the materials you are handling and always keep the area where you make your candles clean.


Friday, February 17, 2017

Top 4 CANDLE MAKING Ideas for the Beginners

There are lots of people who love to collect different kinds of candles. Colorful and scented candles are widely available these days. Candles are required for a number of purposes. There are people who light candles almost every day while they worship.

If you have a hobby of collecting candles then instead of buying them you can try them at home. You just need to collect the candles making supplies and give some quality time to get homemade candles.

Candle Making - The Lit Candle
Candle Making - Photo Flickr
Homemade candles do not only look good but they are cheap. You can create candles of different designs and colors, sizes and shapes. But before taking up the candle making job it is important to get some good candle making ideas.

You can collect candle making ideas from varied sources. Candles can also turn out to be great gifts for birthdays as well as Christmas. If you gift a self made candle to you dear one it can surely become the most special gift.

Unique Candle Making Ideas

Making candles with crayons is a good idea. This process is quite easy. The process is almost similar to making normal wax candles. For this procedure you first need to remove the wrapping papers from the crayons. Next you need to put the crayons in a boiling bag and put it in a pot with boiling water. It will take only ten minutes to melt the crayons and you will get colorful wax out of it. You can then use the molds to create wonderful candles.
Gingerbread pillar is the other idea that can help you create scented candles especially for Christmas. For this you need to melt the wax and then add some brown color to the wax. At a high temperature then you need to add oil which is ginger scented or you can also add dry ginger. You need to be careful while doing this because ginger is quite spicy and it might induce coughing.
You can create candles keeping the seasons in mind. If you are making candles in summer then you can choose the beach theme. You can make candles in the shape of star fish and give them bright colors. You can also add a fragrance which smells just like a refreshing ocean breeze.
Cookie cutter candle is one of the most popular candle making ideas. This can be created as a memento candle by adding something personal. This kind of candle can be made by pouring wax in a large flat box with a number of wicks in it and then cutting the wax with a cookie cutter in the shape you prefer.


Candle Making Ideas for Beginners

If you are a beginner then you need to follow certain steps so that you can utilize the best candle making ideas.

First of all, it is very important to choose the right material for your candle. You should always compare the options available because it will help you find the best quality product at a lower price.
Choose good marketing techniques to sell your homemade candles.


Friday, January 20, 2017

Problems and Solutions for CANDLE MAKING


Making candles can be great fun. It is very exciting to decide what type of candle to make and getting your supplies. However, some individuals quickly become disappointed and frustrated with the process and give up. There are some common problems that beginners experience with candle making. Most of them have quick and easy solutions. It is recommended that all beginners start with the basic candle making process. This gives you the opportunity to learn the basics, then you can move on to making the types of candles you really want to.

An almost burnt-down lit candle on a candle ho...
An almost burnt-down lit candle on a candle holder. (Photo credit: Wikipedia)

One secret to making great candles is to use quality products. In general, candle making supplies are inexpensive. If the wax you purchase is of poor quality, then it is never going to make quality candles. Heating the wax to the proper temperature is very important. The temperature will change depending on the type of candle you are making with it. If the wax isn’t hot enough it won’t form correctly. Likewise, wax that is too hot will lose luster and won’t be as sturdy once it cools. 

Have you every made a beautiful candle, but when you lit it the room filled with smoke rather than the fragrance of the candle? This problem has to do with your wick, it is too long. Simply cut them shorter for future candles. You can snip the tips of the candles you have already created and this should remedy the situation.

Some candles burn and smell great, but they look ugly after a few uses with a crater in the middle of the candle while the edges of the candle jar haven’t even been touched. This is the result of a wick that isn’t wide enough. There isn’t much you can do for candles you have already made except melt the wax in them and start over. You can purchase a wider wick or braid three together to get a good thickness. The wider the candle jar, the wider you need your wick to be for the candle to burn evenly.

Cooling candles is an area of trouble for many beginners. Don’t rush the cooling process or you will damage the hardness of the candle. Forcing the candle to cool will also result in bubbles forming in the top and middle of the candle. While it won’t be a physical defect, the melting wax will go into these bubbles when you have the candle lit resulting in the wick going out. Candles should be allowed to cool in an area where they won’t be moved until completely cool. The area needs to be flat and out of direct sunlight. You will also want to make sure there aren’t any heating or cooling vents in the cooling area.


If you notice that your cooled candle isn’t as appealing as you’d like because the wax pulled away from the glass jar in some areas, try heating your jars in the microwave for a minute or two right before you fill them. This will help the wax adhere to it correctly with a very smooth look all the way around the jar.

It is important to remember that candle making involves some basic concepts. It will take a few tries to complete the steps properly, but give it some time. You will have to experiment to find the methods that work best in your work environment to make the candles you want.